I have just started using coconut husk compost for my spring/summer planting. First of all, I have to comment on how easy it was to transport and use. I didn’t have to lug a heavy bag of compost on the bus- the compost comes a brick sized light block. I took it out of the paper wrapping (which was recycled unlike the usual compost which comes in a plastic bag and it is difficult to find places that recycle them), then put the entire brick into a bucket on a day when I knew it was going to rain heavily.
So when the bucket was full of water, the coconut compost expanded to fill the bucket (one block makes 9 litres of compost). I could then use it to fill my baby bath tub planter which I found abandoned.
I had used up the winter offerings of dried shrubs and leaves as a composting material, on which I lay the coconut husk compost. I spread some seeds on the compost and then spread a thin layer of the coconut husk on that. The coconut husk compost is easy to work with, unlike the conventional compost. My seeds are now sprouting and I will keep you updated on how the plants do.
Those of you following the blog since last year will know that I created a small home composting system. This consisted very simply of putting a plastic pot inside a large planter and covering it with a double lid. Today, I went to see what it was looking like. Here it is, some compost made from kitchen waste six months ago without any additional help-
As the stuff gets composted, it gets compacted and goes down and so I added some more fresh peelings and kitchen waste into it today. I will also be using some accelerator to see if that helps to speed up the composting. As the weather has been so wet, this is not ideal but at least it seems to be working. Inside my kitchen, I have made a four part sorting system- one bin for composting, one bag for cooked food waste, one for dry rubbish and a big bag for recyclables. I tried using a normal sized rubbish bin and realised that it was taking weeks to fill up with the result that the cooked food waste thrown in was getting mouldy. I also have very little cooked food waste which is not compostable in the above manner and so this four part sorting means that I can use my peelings and tea and coffee grinds for compost, crushed egg shells for staving off slugs and also for sprinkling on the pots. The small rubbish is kept in crisp packets or similar size bags that I was going to throw away anyway. This way my kitchen also doesn’t have any mouldy stuff while I save on buying bin bags! Of course, this kind of system will only work if you have small bits of non compostable rubbish and don’t eat lots of meat, etc. Here are my carrot tops growing in my home made compost.
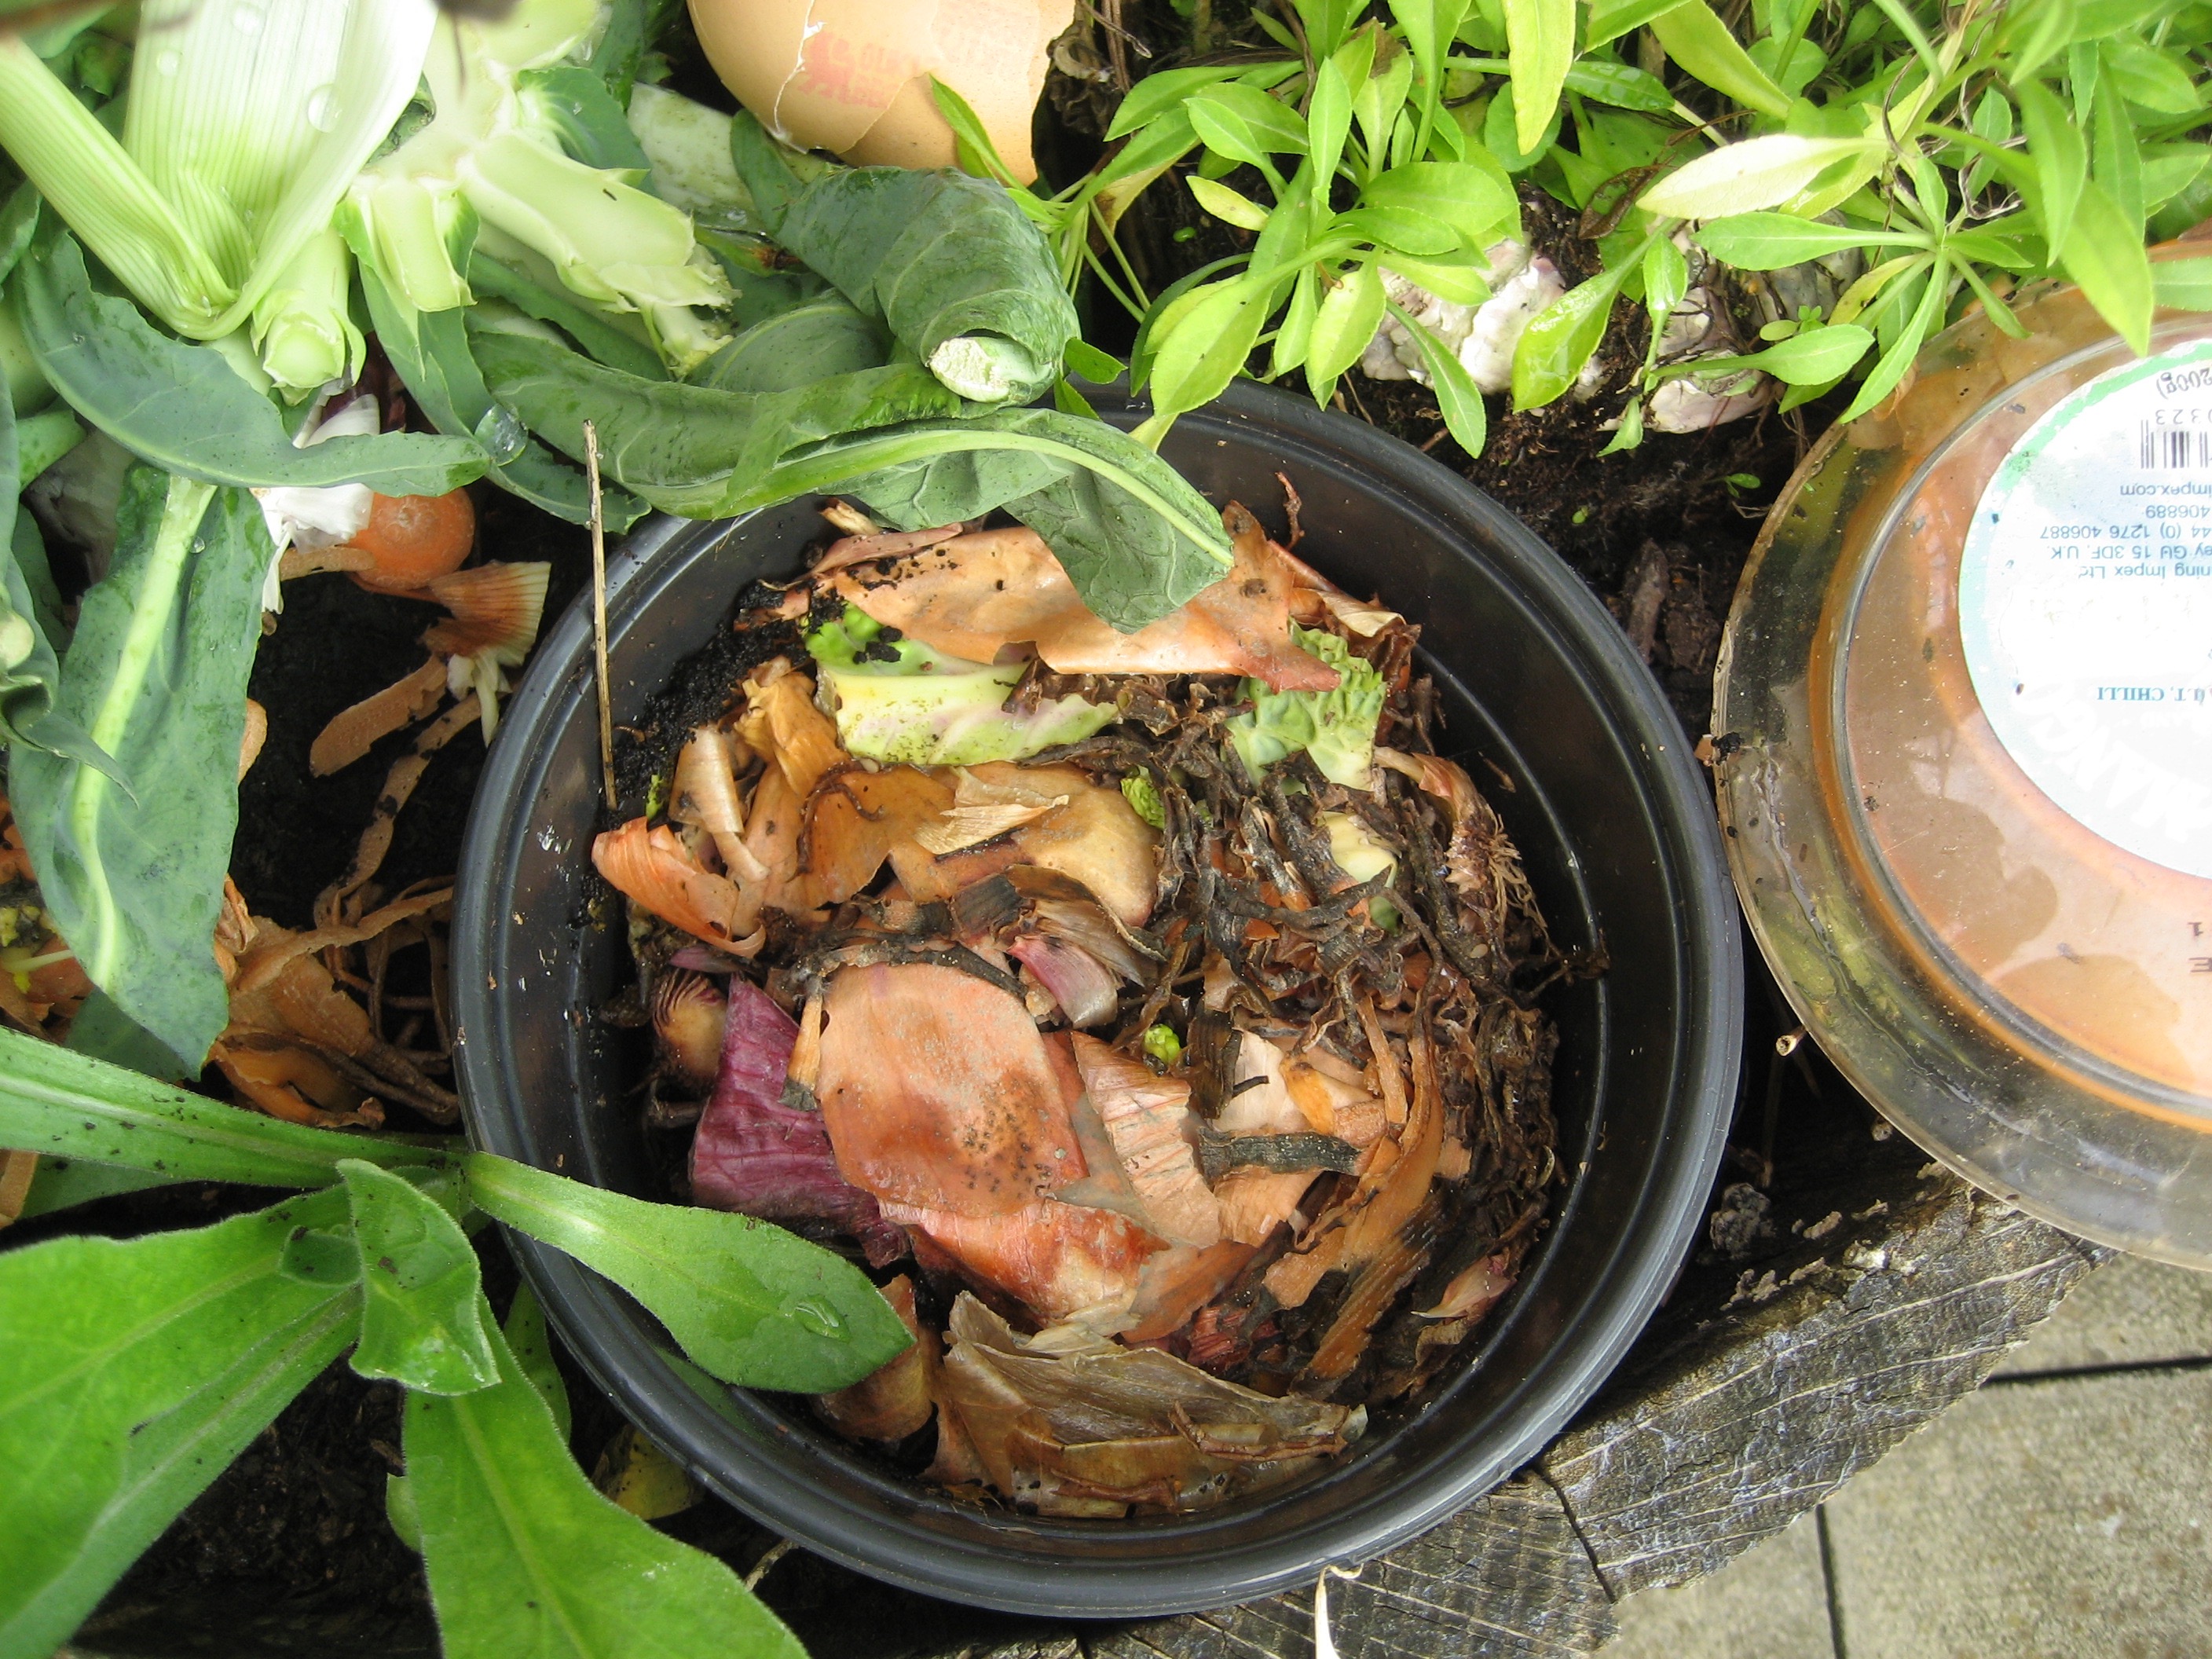
I have been looking into composting for those living in apartments in cities with only containers. So far there are not many options apart from communal composting and small wormeries/bokashi bins. Worms are quite delicate creatures and the thought of killing the worms has prevented me from using worm composting. Bokashi bins also need investment in terms of buying the bokashi powder and perhaps also having a wormery to go with it. So having tried the composting using plastic sheeting last year, I thought of another variation.
This consists of taking elements of composting bins and using them differently, utilising my knowledge as an architect. So I took an ordinary plastic pot and have started filling it up with kitchen waste. It is covered up to prevent flies and other vermin from reaching it. But the main thing is it is placed inside the container as shown in the photo on the right. The holes at the bottom of the plastic pot drain into the soil and therefore there is no mess. The nutrients reach where they need to. The soil around the pot keeps it insulated much as a piece of carpet or double walled construction would. At present, as you can see, the plants are loving it and I have had no problem with this. The waste keeps getting compacted automatically and I keep putting new material in. You have to be careful with the balance of dry and wet materials- I found out. Too much wet stuff like apple or pear cores is not good- I balance it out with onion skins, twigs, dry soil etc but this is much easier than using a shop bought composting bin and reuse of the many plastic pots that come free with any plant purchase. Also, so far no cleaning has been involved and no smells! This home made ‘mini composting bin’ has been working well. I hope to report later in spring to see how it all went.
Sad to say that the summer is almost finished and now I am working to reorganise my little garden for the autumn and winter. One of the lessons, I have learnt is that having too many pots and plants is too much to look after. So after having rescued two barrel planters waiting for the rubbish tip, I got some help in transporting these to my terrace. So for next few months and next year, I am going to use these barrels for a permanent flower ‘show’ and use the smaller pots for summer salads. I gave away extra pots to the neighbours. Better to have fewer good looking planters than several straggly ones!
I had gone away for a week while I left my home made compost to dry so that the slugs go away ‘naturally’ (sorry, I cannot stand slugs). Upon return, again working on the HegelKultur principle, this is how I filled the planter. I don’t like using plastic bottles for the bottom as some bloggers do- I don’t have them anyway and because, I don’t want the risk of plastic decomposing amongst a growing medium (I have seen plastic bags disintegrating even when kept inside). Instead as a first layer, I used broken oyster and egg shells, pieces from a terracotta pot and cardboard packaging. I also put in garden waste and kitchen bits and pieces. Not only do the cardboard soak up the valuable juices from the decomposing waste (unlike the plastic) but also they will decompose eventually someday. It will also lighten up these very heavy barrels and create some air space while they do so.
Next I put in my home made compost, again lightened with some perlite. My mistake in the past has been that the compost has been too ‘wet’ which does not suit most plants. Water should be able to drain naturally as it does in the ground.
I had found a baby’s bath which I now use for making compost and nettle juice- my nettles in the planter provide a year long supply of nourishing organic fertiliser (cut up the long stems and they grow again). This was also mixed with the compost.
Now I took out the plants from the smaller pots and replanted them in the barrel, spreading some new compost around the gaps. Great- at least five less pots to water! and it looks lovely (and saves water). I tried to make it look ‘wild’ rather than planted. Hope you like it! The Cala lily, by the way, is the one I rescued from oblivion- the bulb looked tumorous, but after cutting away those bits, see the gorgeous glory!
Christmas has long gone but the streets are now piled up with discarded Christmas trees, some blocking the pavement, some blocking the roads, waiting to be taken away by the cleaners. How sorry they look!
Some people have been clever- they’ve used up the needles which drop out anyway for mulch or in their compost. So these trees look like this-
For the last seven years, I have been using the same tree, rather the same artificial tree. Agreed that perhaps it doesn’t smell the same, although a clever trick of putting some pine scented oil around does the trick. All I have to do is put it up, put up the decorations and then take them down again for next year. There is no waste and no nuisance. No needles to sweep away. And it doesn’t look too bad, I have to say! When I don’t use it anymore, I know that it will be good to go to a charity shop for someone else to use.
With the wet and warm weather recently, there has been a deluge of slugs who are busy chomping up my salads and leaving slimy trails on my tomatoes. Urggh- I have looked at them and can’t seem to like them. In fact I think I prefer spiders to slugs! Having read many tips from books and on the internet, I have settled on one tip that works brilliantly on container gardens. That are egg shells. They are cost free in the sense that they are waste products of the eggs one has eaten. They are natural and easy to use. I collect them and then put them in a plastic bag and crush them. Then I lay the pieces in the containers.
The crushed eggshells deter not just slugs but also snails and cutworms because they can’t slither across the sharp edges of the shells. As a bonus, the egg shells also contain calcium that the plants love. If you have a compost pile, then putting these into it gives a calcium rich compost which are good for your tomatoes. If you like feeding birds, then crush up the eggshells and add them to a dish near the feeder. Female birds, particularly those who are getting ready to lay eggs or recently finished laying, require extra calcium and will benefit from the extra calcium.
In the short summer season of the UK, there is much to be done. I have too many plants, I know and I have been remiss in taking care of them. One of these was the bay tree that seemed to be stunted and suffering. So I decided to take it out of pot. I found that the root ball was terrible mass of dead and live roots, twisted into each other. Root balls are particular problem with container gardening. These roots often strangle themselves, leading to the destruction of the plant itself.
When I finally managed to get the plant out of the pot, this is what it looked like. Simply working with my fingers or a garden fork did not disentangle the roots. I soaked the root in water in a bucket for many days, taking it out from time to time and untangling the roots, gradually. Once the roots were free, I cut away the dead roots. In the meanwhile I prepared the pot by layering alternate greens, dry leaves and bought compost. This is a technique I had learnt from Cuban horticulturists who have created amazing inner cities farms to grow food after the embargo on Cuba was imposed. As they were short of materials, they created techniques such as this layering of green and compost.
This way I reused the tired soil, revitalising it with fresh material. My final and deepest layer was of new compost into which I planted the bay tree again. The plant definitely looks happier. I have used the Cuban technique for other pots and again the results have been good and have saved me money.